Cisco Nexus 7000 Series Virtual Device Contexts (VDC)
Virtual Device Context (VDC)
With Cisco NX-OS VDC you can divide a physical N7K series switch into multiple logical switches, it will have different management/control and definitely different data planes. By default all ports belong to the default VDC. From default VDC you can create other VDCs and/or jump to them (with command switchto vdc). You cannot delete the default VDC.
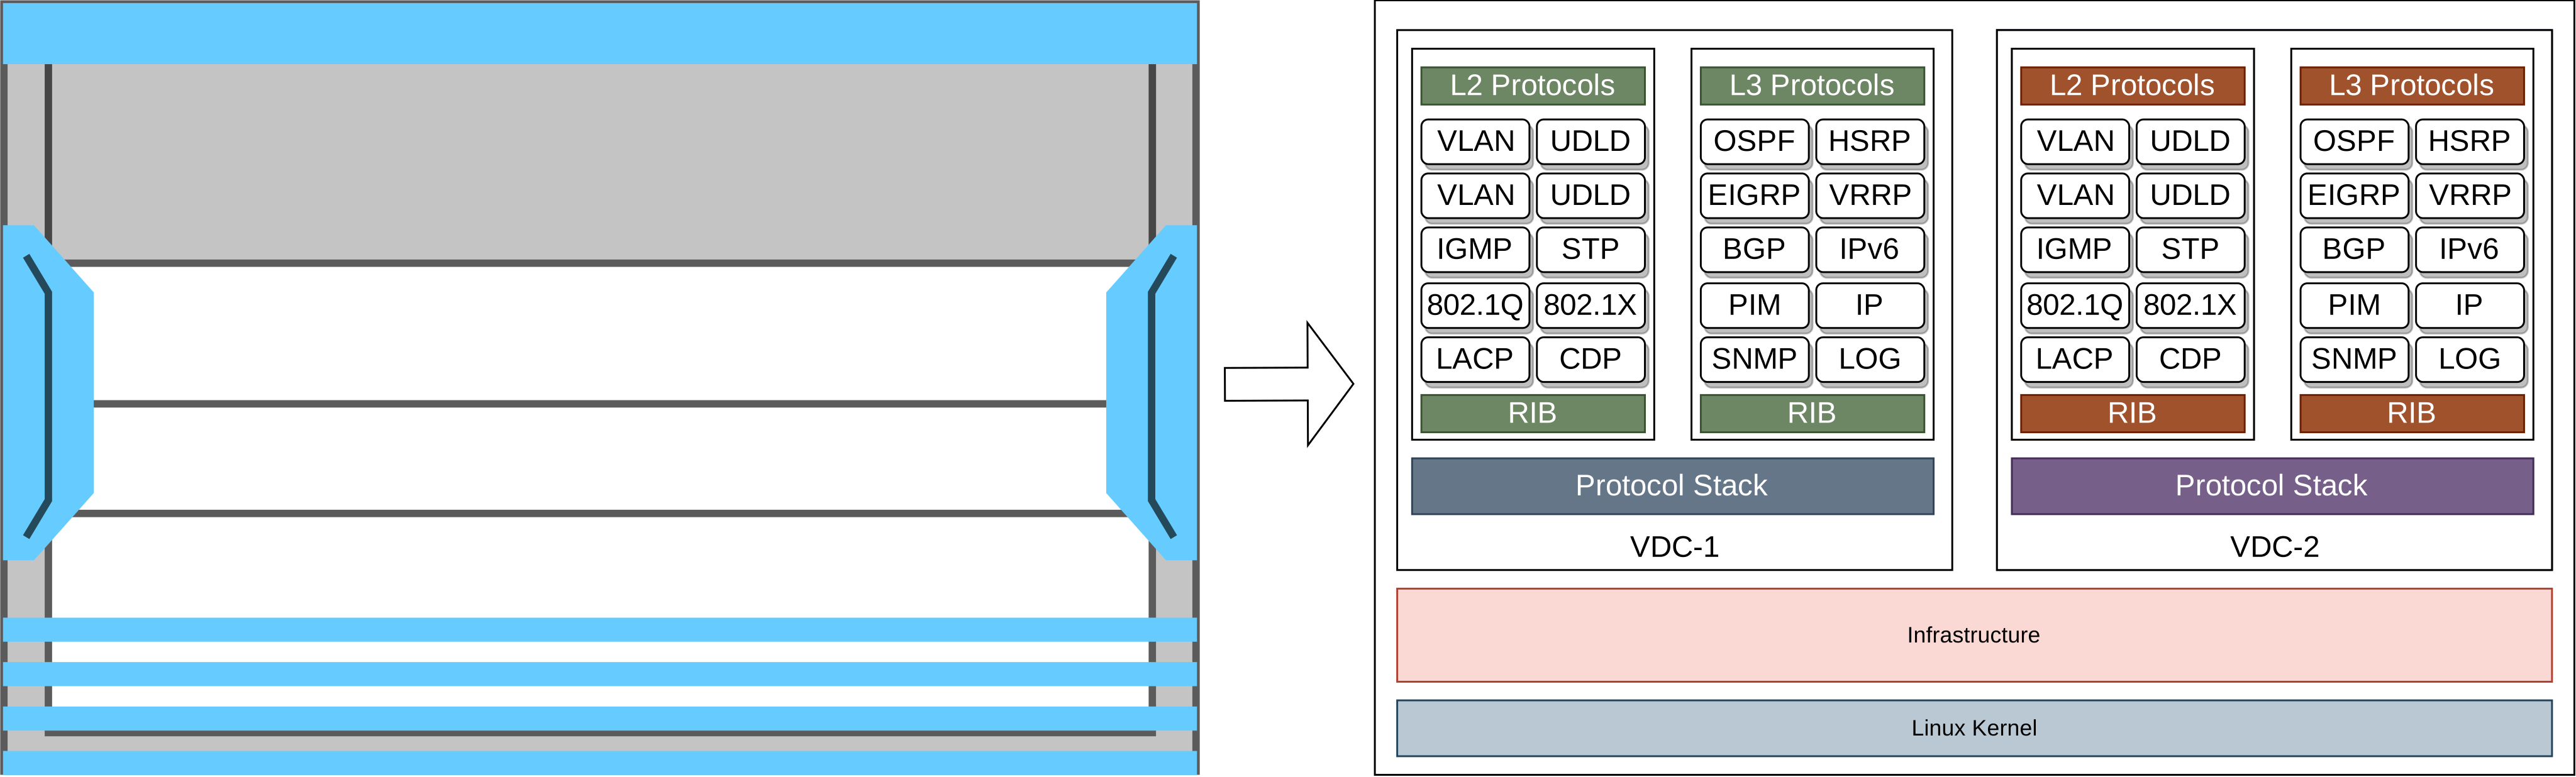
Here are some notes to consider for VDCs
- VLANs: Two different VDCs can have same VLAN numbers on them - because each VDC is a separate virtual device.
- Port Channel: All port channel member ports must be in the same VDC.
- In order to create VDCs you must be a member of network-admin privilege group and you must log in to the default VDC.
- NX-OS does not support inter-VDC links. In order to run communication between different VDCs you need to run a physical cable from a port to one VDC to a port to the other VDC.
- To create Ethernet VDCs, you need to have license.
- Storage VDCs do not need a VDC license because FCoE license suffices for this purpose.
- You have 120 days of grace period with command
license grace-period.
Different Types of VDC
So far, you have noticed we have discussed about Default VDC. But there are other types of VDCs also. Here is the list of all different types of VDCs within Nexus Platforms
- Default VDC:
- VDC 1.
- Only on 7000 series.
- From here we can manage other VDCs. Including their creation and deletion.
- You install licenses on Default VDC.
- Once you reload the default VDC, the entire switch reloads.
- Admin VDC:
- You can replace the default VDC with Admin VDC after introduction of NX-OS 6.1(1) .
- Default and admin VDCs cannot coexist at the same time.
- VDC 1.
- You cannot allocate interface to Admin VDC except mgmt0 interface.
- Once you create Admin VDC, you cannot change it back to Default VDC. You need to earase the configuration and provision the switch again.
- Non-Default VDC:
- The VDCs which you create through Default VDC.
- They run their own L2/L3 protocols per VDC.
- They are isolated from other VDCs.
- Storage VDC:
- Separates LAN and SAN traffic.
Create and Manage VDCs
To create an Ethernet VDC you can simply use command vdc NAME.
To create a storage VDC, simply use: vdc NAME type storage.
Then you will require to specify the interfaces to the VDC with command allocate interface INTERFACES under the VDC configuration.
vdc SALES
  allocate interface e4/1-16
For verification, you can issue show vdc membership and show interface status.
Here is how you switch to a VDC from the default VDC and you switch back to the default VDC from a VDC:
7K(config)# switchto vdc SALES
7K-SALES(config)# switchback
To disable the combined hostname meaning that 7K-SALES to SALES use command no vdc combined-hostname.
VDC Workshop
Well, here is an N7K with some VDC sample configuration and how we assign interfaces to them.
N7K01(config)# vdc resource template otv
N7K01(config)# limit-resource vrf minimum 8 maximum 16
N7K01(config)# limit-resource vlan minimum 16 max 32
N7K01(config)# limit-resource port-channel minimum 0 max 32

N7K01(config)# vdc resource template switch
N7K01(config)# limit-resource vrf minimum 16 max 32
N7K01(config)# limit-resource vlan minimum 16 max 129
N7K01(config)# limit-resource port-channel minimum 32 maximum 64

N7K01(config)# vdc VDC01
N7K01(config)# template otv
N7K01(config)# ha-policy single-supervisor reset
N7K01(config)# system hap-reset
N7K01(config)# limit-resource module-type m1 m1x1 f1
N7K01(config)# allocate interface ethernet 3/1-8
N7K01(config)# allocate interface ethernet 4/1-16

N7K01(config)# vdc VDC02
N7K01(config)# template switch
N7K01(config)# ha-policy dual-supervisor bring down
N7K01(config)# limit-resource module-type m1 m1x1 f1
N7K01(config)# allocate-interface ethernet 3/17-24
N7K01(config)# allocate-interface ethernet 4/17-24