Kali Linux Installation
kali-linux
Installing the Kali Linux 2022.1 virtual machine on VMware Workstation Player, with bridged networking and a static IP address.
For the purpose of this course, we are going to install Kali Linux according to “Virtualization: Type 2 Hypervisor” section of this article.
Step 1. Download and install a type-2 hypervisor
You can skip this step if you already have a hypervisor type installed on your host operating system.
Amongst Oracle VirtualBox, VMware Workstation Pro, and VMware Workstation Player, I am going to choose the latter from here.
- Run the installer.
- Next.
- Read “VMWARE END USER LICENSE AGREEMENT” then hit “I accept the terms in the License Agreement”, then hit “Next”.
- Next.
- Next.
- Next.
- Install.
- Wait about 2-3 minutes to complete the installation.
- Reboot? Yes.
- After reboot, open the VMware Workstation Player you installed earlier.
- Select “Use VMware Workstation 16 Player for free for non-commercial use”; then hit “Continue”.
- Finish.
Step 2. Deploy Kali Linux VM
- Get Kali Linux from here.
- Hit download icon “↓”.
- Right-click and extract the content of the kali-linux file to a permanent path.
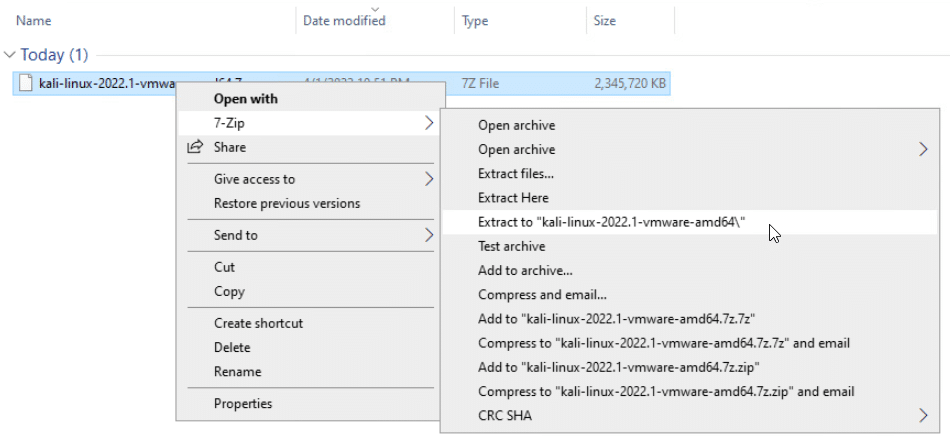
- [Optionally,] you can delete the .7z file.
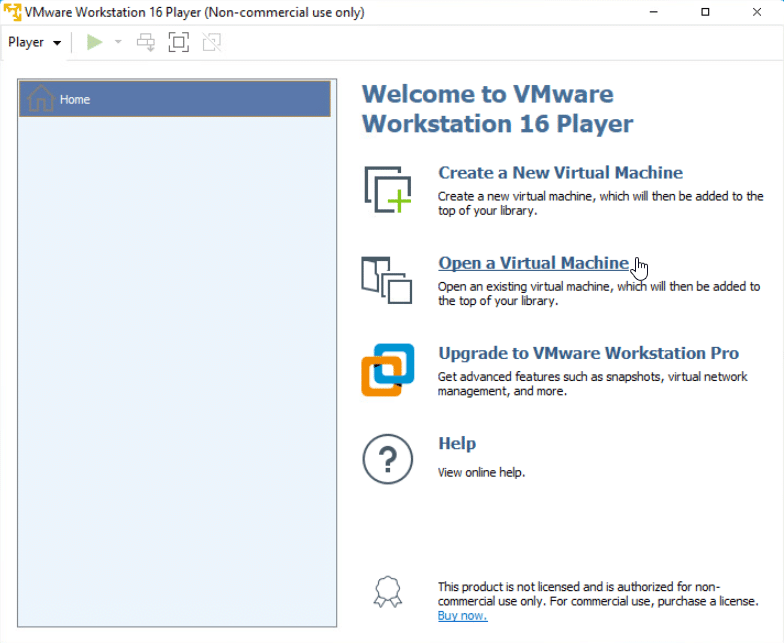
- Open up VMware Workstation Player.
- Click on Open a Virtual Machine.
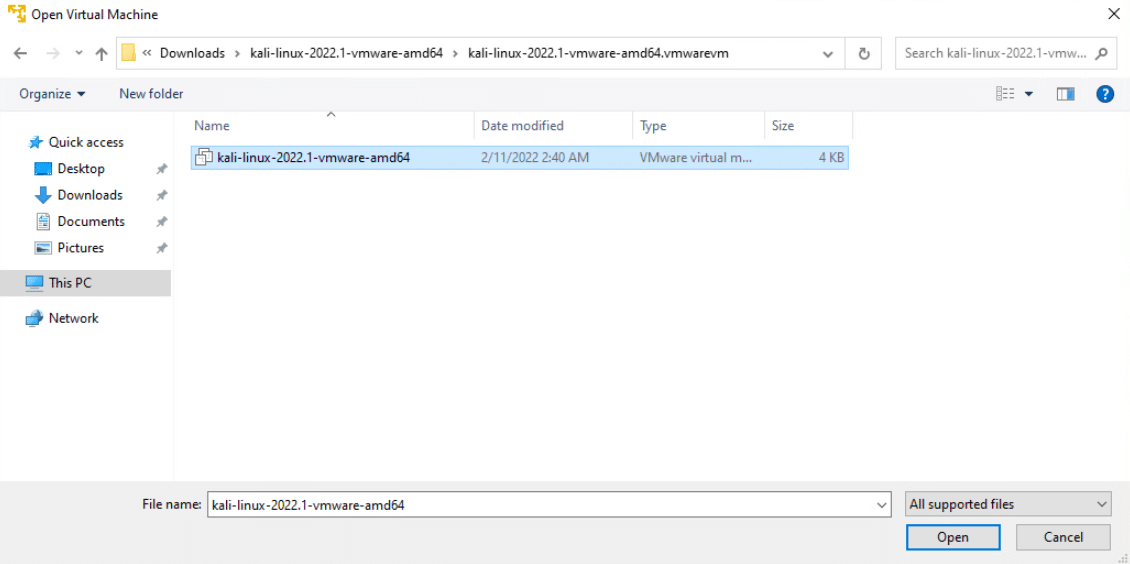
- Double-click on the kali-linux-2022.1-vmware-amd64.vmx file you had previously downloaded.
- The VM will be imported to your VMware Workstation Player.
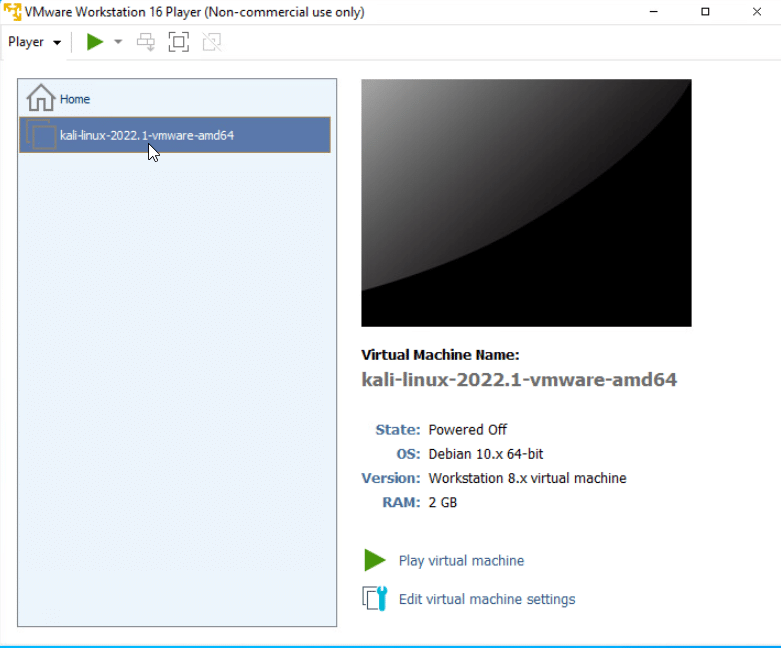
- Before turning on the VM, we need to adjust the networking:
- Go to Player -> Manage -> Virtual Machine Settings…
- Select Network Adapter
- Select “Bridged” Network connection
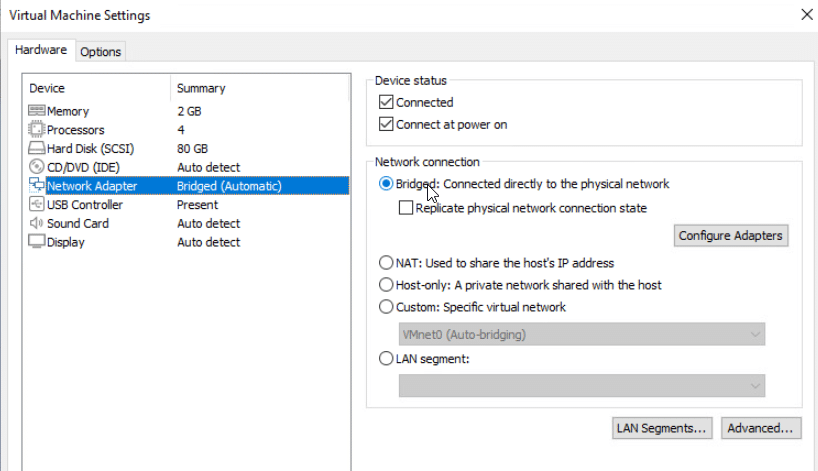
- Click OK.
- You can now hit “Play virtual machine”.
- Note that if the host virtualization is not enabled on your computer BIOS, you need to power cycle your computer and enable it through BIOS/firmware.
- Log in to the GUI with the default credentials of kali/kali
Step 3. Initial Network Setup
- Right Click in the Networking icon then select “Edit Connections…”
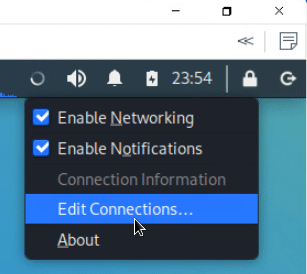
- From there, select “Wired connection 1”. then hit the edit icon.
- Navigate to “IPv4 Settings” tab, then give it an IP within the same network as your host operating system:
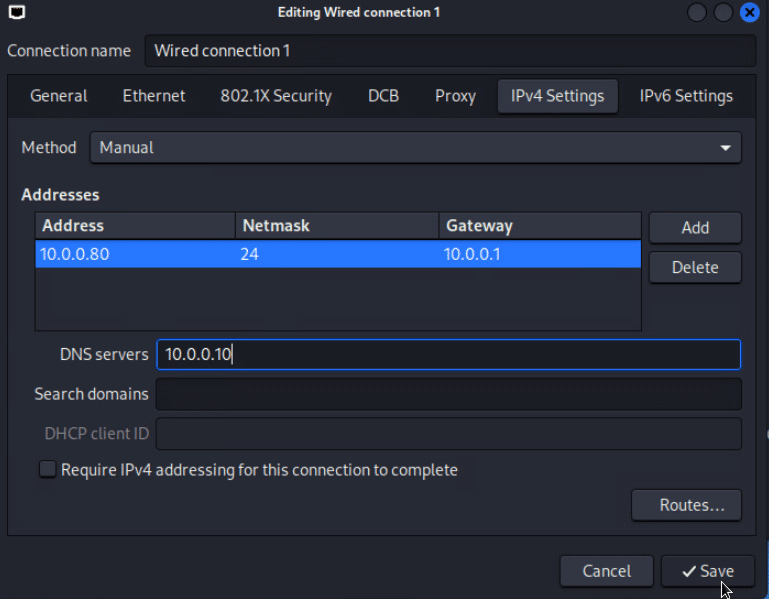
- Click “Save”
- Right-click anywhere on the desktop, then select “Open Terminal Here”
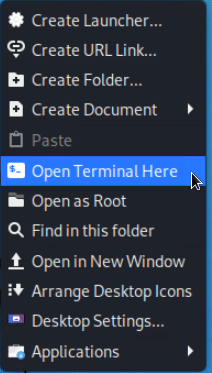
- Check your IP configuration:
┌──(kali㉿kali)-[~]
└─$ ip a
1: lo: <LOOPBACK,UP,LOWER_UP> mtu 65536 qdisc noqueue state UNKNOWN group default qlen 1000
    link/loopback 00:00:00:00:00:00 brd 00:00:00:00:00:00
    inet 127.0.0.1/8 scope host lo
       valid_lft forever preferred_lft forever
    inet6 ::1/128 scope host
       valid_lft forever preferred_lft forever
2: eth0: <BROADCAST,MULTICAST,UP,LOWER_UP> mtu 1500 qdisc pfifo_fast state UP group default qlen 1000
    link/ether 00:0c:29:56:c3:12 brd ff:ff:ff:ff:ff:ff
    inet 10.0.0.80/24 brd 10.0.0.255 scope global noprefixroute eth0
       valid_lft forever preferred_lft forever
    inet6 fe80::20c:29ff:fe56:c312/64 scope link noprefixroute
       valid_lft forever preferred_lft forever
- Check if you can reach your Default Gateway
┌──(kali㉿kali)-[~]
└─$ ping 10.0.0.1
PING 10.0.0.1 (10.0.0.1) 56(84) bytes of data.
64 bytes from 10.0.0.1: icmp_seq=1 ttl=64 time=1.21 ms
64 bytes from 10.0.0.1: icmp_seq=2 ttl=64 time=1.31 ms
64 bytes from 10.0.0.1: icmp_seq=3 ttl=64 time=1.32 ms
64 bytes from 10.0.0.1: icmp_seq=4 ttl=64 time=0.979 ms
^C
--- 10.0.0.1 ping statistics ---
4 packets transmitted, 4 received, 0% packet loss, time 3349ms
rtt min/avg/max/mdev = 0.979/1.202/1.321/0.136 ms

┌──(kali㉿kali)-[~]
└─$